Easy Router Rev
Reverse engineering custom protocols on a router.
Reverse engineering custom protocols on a netgear router and searching for vulnerabilities.
Table of content
- Foreword
- Board Analysis / OSINT
- Firmware Extraction with ReadyShare
- Firmware Analysis
- The Pot Protocol
- To be continued…
This is an archived post/project that will likely never be finished.
Foreword
This post is to document my discovery and learning process as I get into embedded vulnerability research. I wanted to do this because I figured it would be an interesting environment to apply and cementify my rev skills and hopefully find some low hanging fruit. The hardware portion of the lab for ripping firmware is also relatively cheap. I started my first project on a router I grabbed from Goodwill. When I was initially starting this project (shortly before finals) in the spring, I was finding a lot of cool stuff. In particular, while doing VR on this router I ran into a custom protocol with an unknown purpose in addition to a custom upnp implementation. After the initial rev on the custom protocol, which I’ll henceforth refer to as the pot protocol, I had to pause the project to start studying for my final exams. I forgot about this project until a month ago. I was excited to bust out the old router, connect to UART and see what’s good, but alas the boot process could not even make it to the second stage. The router was completely bricked, looped in the very early stages of the boot process where it continuously tried over and over to read from flash, never even making it to UBOOT. 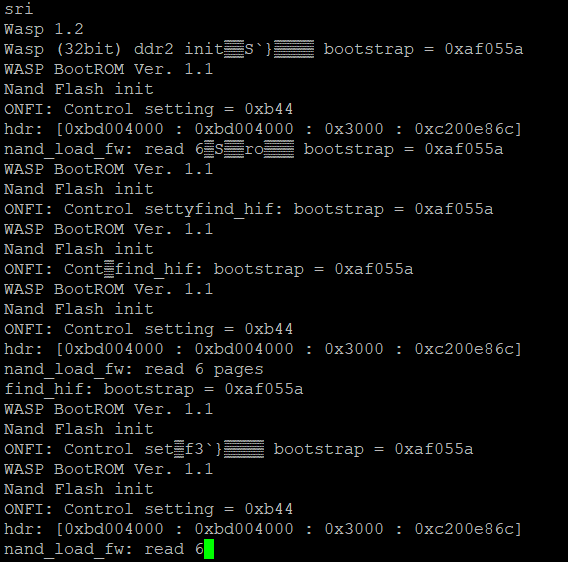
Luckily, I had already extracted the firmware (plus I later found it online) so I can emulate it, but some things might prove tricky (the POT protocol uses its own partition that won’t be included implicitly when using something like Firmadyne). Nevertheless in face of all this trouble, this series will have a part two (probably diving into the world of qemu and system emulation) and hopefully will end in a CVE number if I’m lucky. However annoying, these issues that are stopping me from doing the actual VR can help me learn valuable skills and will be undoubtedly useful in future research. Just hopefully these issues don’t give me too much trouble as I still have about a thousand other devices I want to go through after this one.
Board Analysis / OSINT
Initially when I got the device I was curious about my chances of finding something juicy so I did some threat intelligence. Turns out, this thing is still pumping out bugs both on this specific router and from similar vendor products, and a lot of them are related to memory corruption. 
This is great news for me because that means I get to look at a lot of (probably) trashy code, plus I have a lot of devices from the same vendor in my collection all of which are old and second hand.
After I was finished inspiring myself I began OSINT related to the device itself, the FCC report reveals internal photos of the device which show what looks to be a UART and what’s likely a JTAG interface. 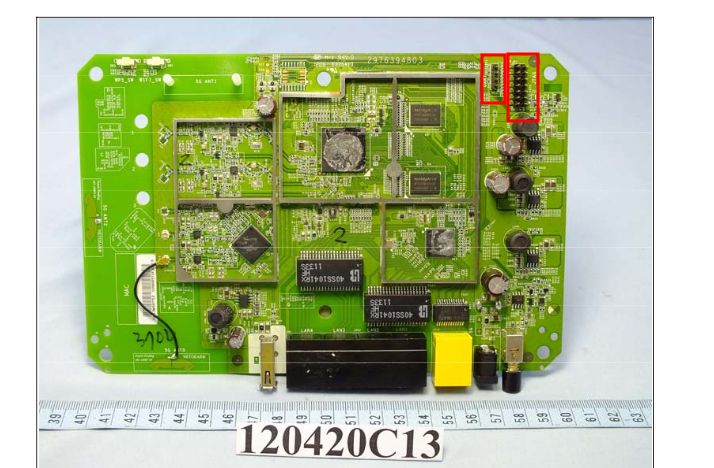
In addition to the default login credentials for the web interface (admin:password), this is pretty much all I gathered during the recon phase and was more than enough. Afterall, this can get boring and there’s no better sound than the crackle of a plastic shell being peeled off of what’s really important. Opening the device itself, we can see that these peripherals are beautifully labeled to confirm the previous suspisions and that the UART interface still even has headers attached. 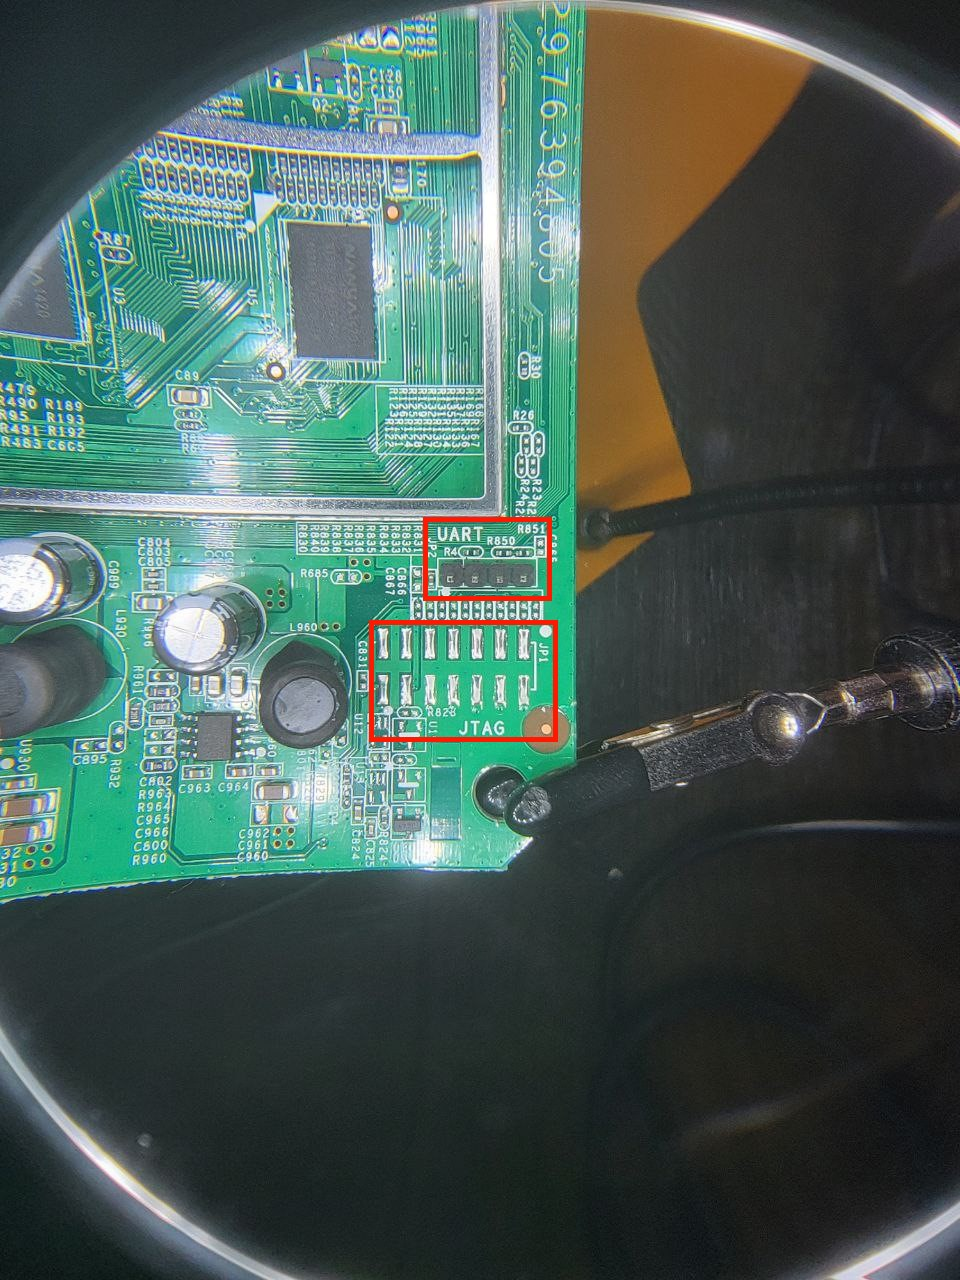
You can easily determine what pin is what on the UART interface using a multimeter. Note that when you turn the device on the boot process will produce a lot of logging. Knowing this, you can turn the device on and observe the pins you suspect to be transmit and recieve. Transmit would fluctate at a higher voltage than recieve, because of the verbosity. After doing this test, we can also confirm the pins on the UART header. 
I ended up using a bus pirate (which can do everything) to connect to serial with the following:
- V -> 3.3v
- T -> MISO
- R -> MOSI
- GND -> GND
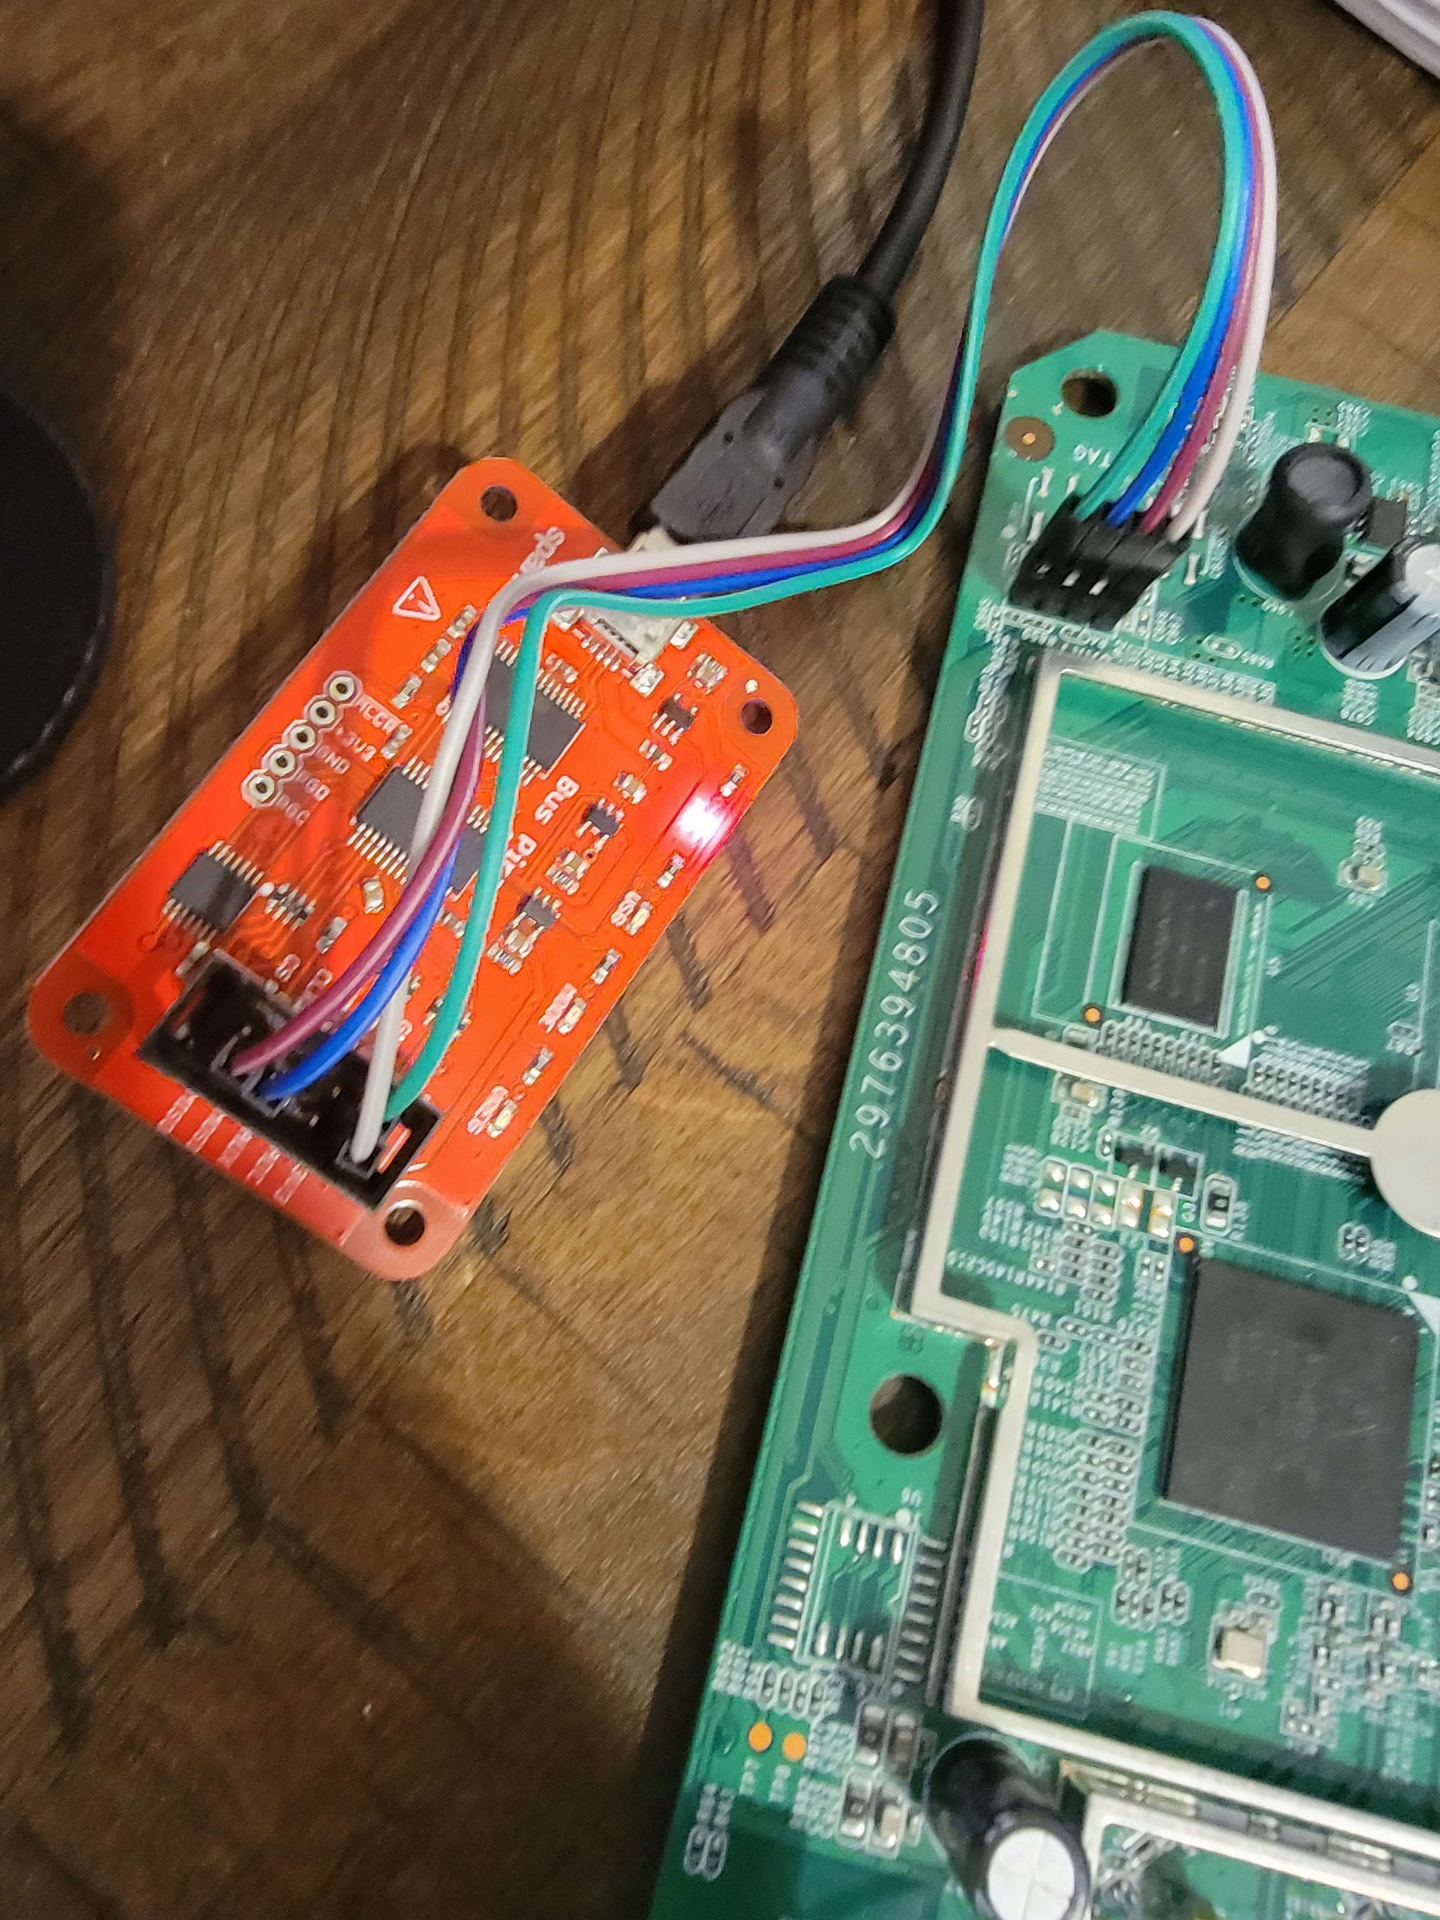
After that it’s just a matter of configuring the bus pirate for UART. Be sure to interact with a UART connection via a bridge with flow control so you can send and recieve data. 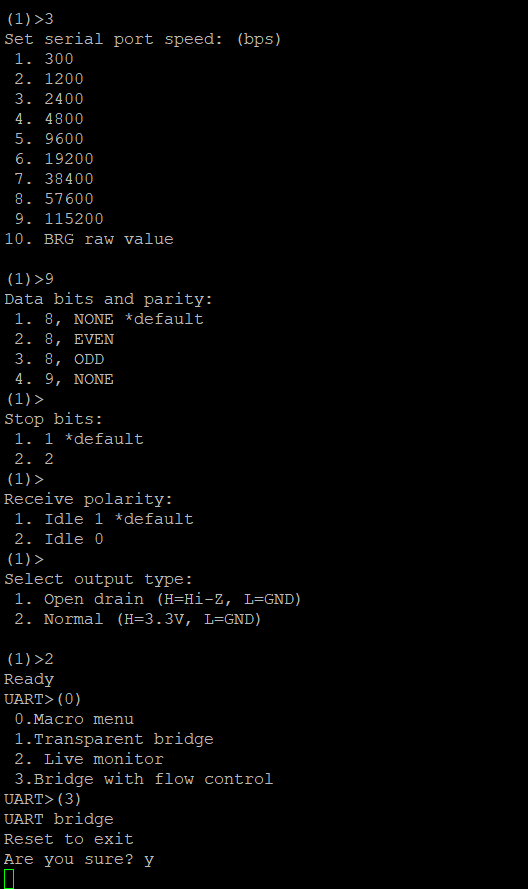
During the boot process I spotted several interesting block devices being listed in the output. Notably the pot partition, which is being used by the POT protocol, in extracting the firmware, it would also be beneficial to extract these block devices. Note that MTD is the framework that allows I/O access to memory segments such as flash memory. 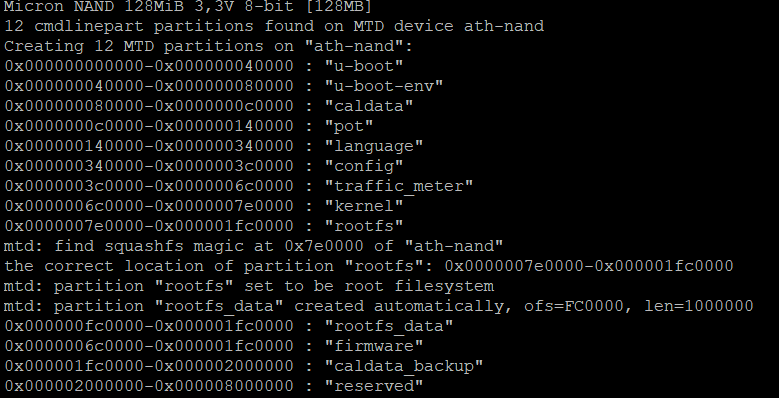
Also for the sake of due diligence, I labeled the chips on the PCB and kept links to datasheets in my notes for reference. I observed the following:
- Atheros AR9580-ARIA (Wireless network driver)
- Atheros AR8327-BLIA (Network switch chip)
- NANYA NT5TU32M16EG-AC (DRAM) (512mb)
- NANYA NT5TU32M16EG-AC (DRAM) (512mb)
- ATHEROS AR9344 (SoC) (on chip flash) (MIPS) (https://datasheetspdf.com/pdf-file/825113/Atheros/AR9344/1)

Firmware Extraction
At the time of my research, I somehow overlooked the obvious place for the firmware to be and could not find it online. So I ended up extracting the firmware via Netgear’s ReadyShare feature. I initially considered UBOOT for firmware extraction, but upon noticing a USB port on the board figured there was a much easier route. On the UART we are dropped into an OpenWRT shell with a read-only squashfs filesystem. Netgear utilizes the readyshare feature and allows one to insert a thumbdrive to be used as an FTP storage device, which will obviously be writable. After plugging in a USB and rebooting the device it becomes discoverable. I begin by listing the mtd partitions and copying whatever I think is interesting.  Devices are copied with the command
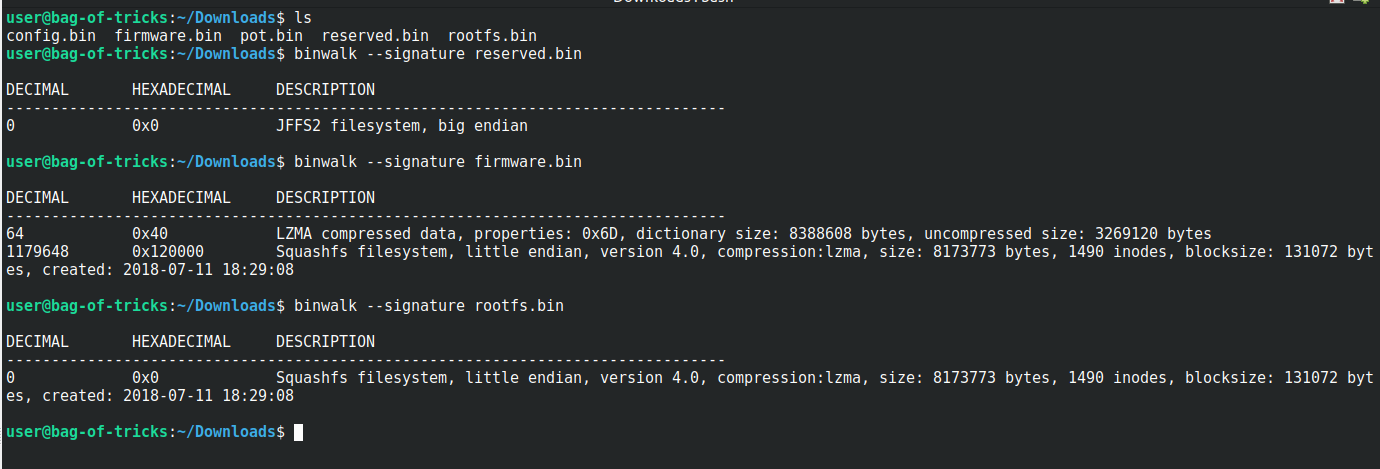
 dd if=/dev/mtdblockX of=/mnt/sda1/example.bin The block partitions are a ro block device and are what should be copied, rather than the mtd partition which provides direct access. I ended up downloading the following partitions:
- config - Router configurations, probably networking configuration
- pot - related to custom protocol
- rootfs - file system
- firmware - file system, kernel, uboot, etc
- reserved - unknown Afterwards I am able to copy everything onto my computer over the network using the ReadyShare service.

Firmware Analysis
At this point I did some environment setup by setting up the device as a MITM between my actual access point so I could interact with it easily in my LAN. I also checked that the device was using the latest firmware, which was from 2015! Starting my search, I recalled something I found particularly interesting from the boot logs was the following messages:
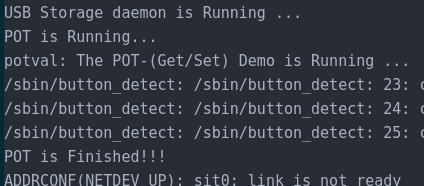
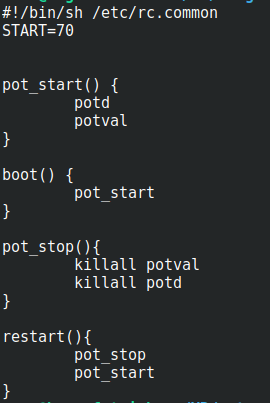
There appears to be something particularly interesting being run during the boot process in /etc/init.d/pot. It executes the following MIPS binaries in order:
- potd
- potval
potd appears to be the main service, while potval seems to attempt to expose the service. Initial examination reveals the POT binaries are the same and what they execute differentiates based on the first argument which is the binary’s name.

Searching the filesystem for more files that have strings that mention some sort of POT feature turns up the following list:
- /www/hidden_POT.htm
- /www/POT.htm
- /etc/init.d/pot
- /tmp/pot_value
- /usr/lib/opkg/info/pot.list
- /usr/sbin/potd
- /usr/sbin/potval
- /usr/sbin/ntpst
- /usr/sbin/stamac
Also interestingly, there appears to be hidden pages to view the status of POT on the webserver. Looking at the exposed services, in addition to the POT protocol which is listening on port 3333, a custom implementation of upnp also seems to be in use, which is a historically buggy protocol.
The Pot Protocol
So there is a custom protocol that appears to be doing some sort of black magic. Depending on what we send it and how it processes what we send it, it could be providing us some exploitation opportunity or it could be doing jack. Either way I aim to find out and ease my mind on this component of the firmware before moving onto another. My first point of research will obviously be the pot binary. Going into this I was hopeful and ready, but in the end I could not find anyway to abuse the service as it does not provide a lot of interaction or deeper functionality besides tracking time. Note that this is also the only component of the firmware I started analyzing before my finals and the untimely passing of this device, so in the second part I will likely be covering emulation, which will likely not be easily cheesable with Firmadyne since there are multiple block devices I also want emulated. But the next thing to analyze and the most interesting would be the custom UPnP protocol. This probably also does a lot more stuff and has a larger codespace. For now though, let’s cross this POT protocol off of the checklist. 
I did most of the analysis statically in Binja, but also interacted with the live service to confirm certain suspicions. Looking at main, we can see that depending on the name of argv[0], $t9 is set to the address of the relevant function and then called. I rename each symbol appropiately. 
Starting with the potd functionality, this portion of the program seems to be in charge of a few things:
- It will initialize the pot mtd if it is being run for the first time.
- It will seek the next free spot from the partition and write it to the pot.
- It will increment pot every minute, writing to the pot and seeking to the next free spot in thhe mtd.
- The max pot value is 4320
- In the case that the next available offset in the mtd exceeds 0x20000 it will wrap to 0x0.
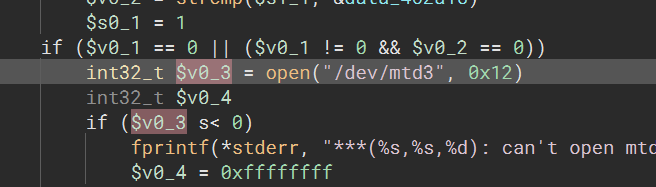
Firstly we see that the pot mtd is being opened and accessed by further functionality. We initialize seek_offset to 0 and creating an 0x800 buffer for the mtd. It starts by calling lseek with the seek_offset (which will be 0 the first iteration) and the mtd. This will change the file descriptor location in the mtd by adding the eek_offset Following this, 0x800 bytes are read into the md_buff. There is then a check to see if the first word is equal some sort of sentinel value, if it isn’t it will increase the seek_offset by 0x800 to point to the next POT value. There is also a check to make sure that the seek_offset is not at the max value. 
The other part of the conditional (when the next seeked offset starts with the sentinel value) the seek_offset is reset to 0 and to additional values that we’ll get to later or set. Based on this we can assume that the sentinel value denotes the last available free block in the mtd device.

After this, the free_spot is set and the loop is broken. This whole block of the code is to simply initialize the free_spot to be used to read/write the pot values.

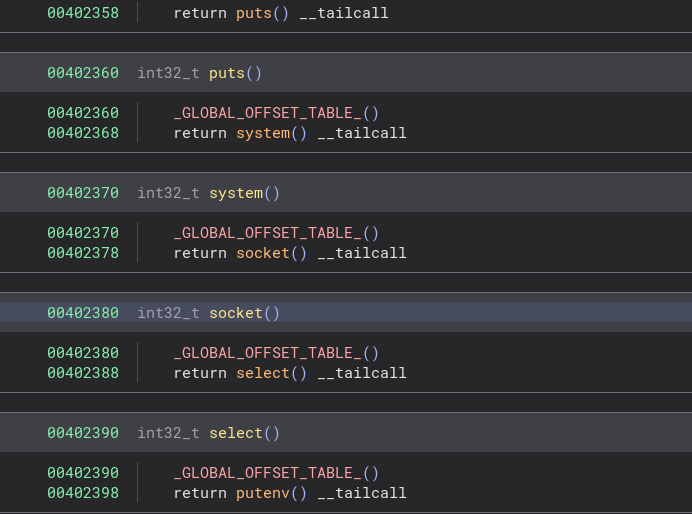
Before moving onto the start of the interesting stuff, I ran into something a little weird when viewing the plt entries, it seems that Binja gets the default base address wrong. Note how each call is incorrectly resolving the one above it. (I later found out this was a new issue with BinaryNinja and MIPS, it for some reason messes up the plt)
This is an archived post/project that will likely never be finished.